Qt Quick 3D - HelloCube 示例
演示如何在 Qt Quick 3D 中一起渲染 2D 和 3D 对象。

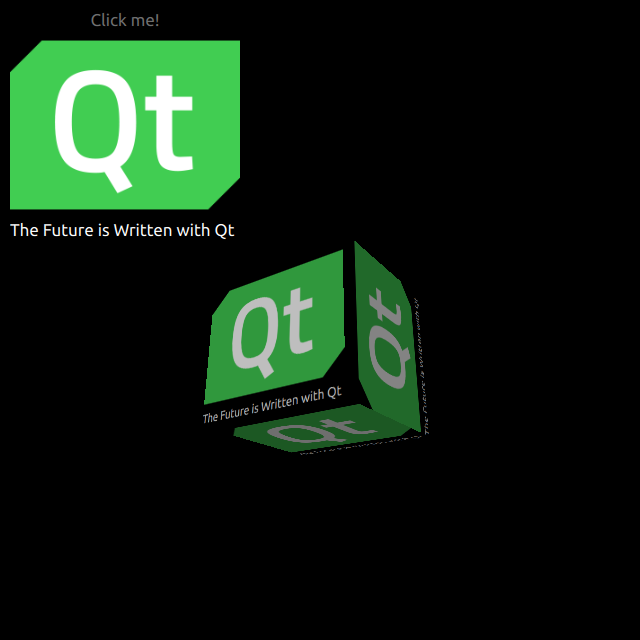
HelloCube 演示如何在 Qt Quick 3D 中渲染嵌有 2D 元素的 3D 立方体。
绘制 2D 元素
我们在 main.qml 文件中设置整个场景。
要使用 QtQuick3D 模块中的类型,我们必须导入它
import QtQuick3D
我们使用图像和矩形上的文本定义简单的 QtQuick 元素。
Image {
    anchors.fill: parent
    source: "qt_logo.png"
}
Text {
    anchors.bottom: parent.bottom
    anchors.left: parent.left
    color: "white"
    font.pixelSize: 17
    text: qsTr("The Future is Written with Qt")
}
此简单矩形有两个用于垂直翻转的动画。
transform: Rotation {
    id: rotation
    origin.x: qt_logo.width / 2
    origin.y: qt_logo.height / 2
    axis { x: 1; y: 0; z: 0 }
}

PropertyAnimation {
    id: flip1
    target: rotation
    property: "angle"
    duration: 600
    to: 180
    from: 0
}
PropertyAnimation {
    id: flip2
    target: rotation
    property: "angle"
    duration: 600
    to: 360
    from: 180
}
绘制 3D 立方体
绘制立方体非常简单。在定义 Camera 和 Light 之后,我们使用内置的 Model 创建一个立方体。在这个例子中,我们将之前的 2D 矩形作为漫反射 Texture 渲染到立方体表面。在我们的矩形中,我们将 layer.enabled 设置为 true。
layer.enabled: true
当启用时,该属性使 2D 元素渲染到离屏表面,然后我们将它用作立方体的纹理。
id: cube
source: "#Cube"
materials: DefaultMaterial {
    diffuseMap: Texture {
        sourceItem: qt_logo
    }
}
eulerRotation.y: 90
文件
- hellocube/CMakeLists.txt
- hellocube/hellocube.pro
- hellocube/main.cpp
- hellocube/main.qml
- hellocube/qml.qrc
图像
© 2024 The Qt Company Ltd. 本文档中包含的贡献的文档版权属于各自的所有者。本提供的文档是根据自由软件基金会发布的《GNU 自由文档许可协议版本 1.3》许可的。Qt 及相关标志是 The Qt Company Ltd. 在芬兰和/或其他国家的商标。所有其他商标均属于其各自的所有者。
