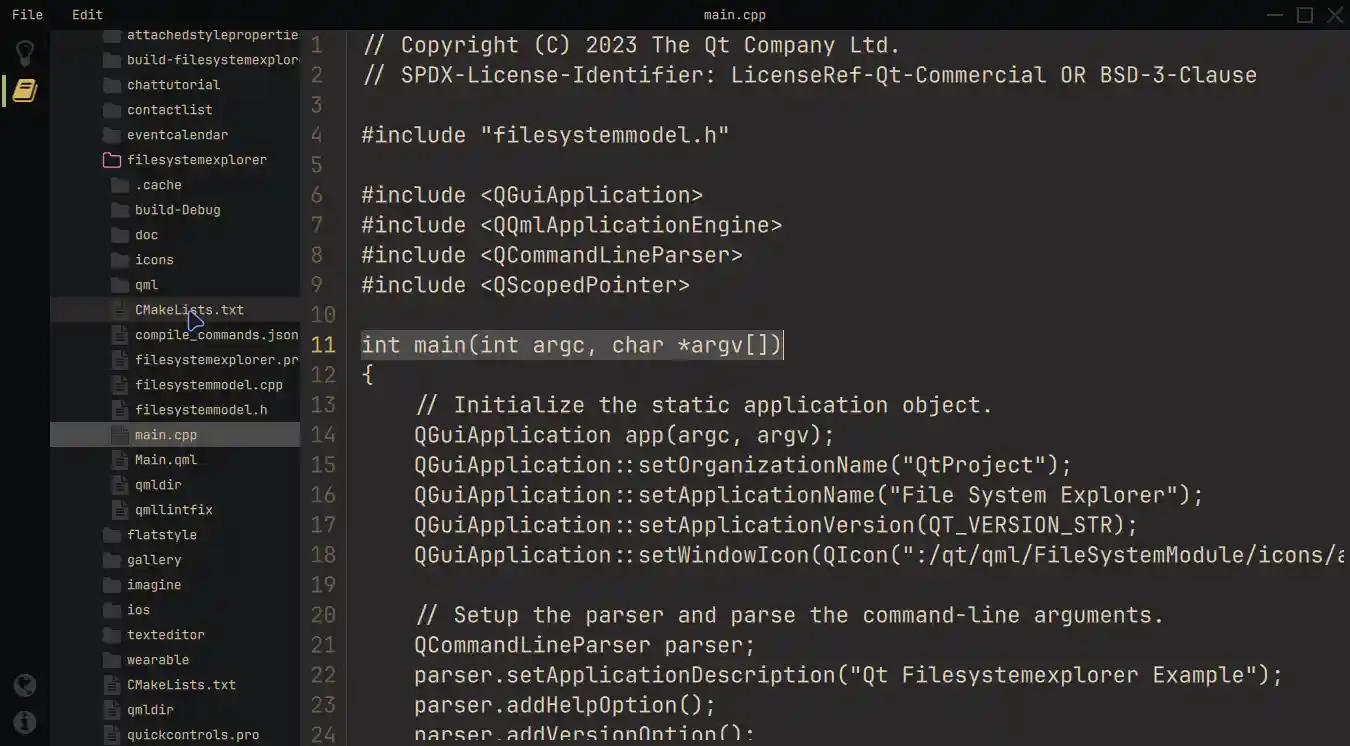
文件系统资源管理器
一个利用定制 Qt 快速控件显示文件系统中的文本文件的桌面 QML 应用程序。
在这个示例中,我们使用了一个包含三个主要组件的现代布局。左边有一个基于图标的侧边栏,紧随其后的是可调整大小的TreeView,它从QFileSystemModel显示文件系统,最后是TextArea,用于显示选定的文本文件。所有操作系统具有一致的界面和感觉。我们通过使用定制的快速控件和无边框窗口以及我们自己的窗口装饰来实现这一点。从命令行启动此应用程序时,可以选择在参数中提供初始目录。此初始目录将被TreeView用作显示目录结构的起点。

运行示例
要从Qt Creator运行示例,请打开欢迎模式并从示例中选择示例。有关更多信息,请参阅构建和运行示例。
现代布局和结构
首先,我们在全局 QML 对象中提供颜色。这样,我们可以提供更精细的控件,以控制应用程序的外观。
pragma Singleton

QtObject {
    readonly property color background: "#292828"
    readonly property color surface1: "#171819"
    readonly property color surface2: "#090A0C"
    readonly property color text: "#D4BE98"
    readonly property color textFile: "#E1D2B7"
    readonly property color disabledText: "#2C313A"
    readonly property color selection: "#4B4A4A"
    readonly property color active: "#292828"
    readonly property color inactive: "#383737"
    readonly property color folder: "#383737"
    readonly property color icon: "#383737"
    readonly property color iconIndicator: "#D5B35D"
    readonly property color color1: "#A7B464"
    readonly property color color2: "#D3869B"
}
由于我们不希望依赖操作系统的窗口装饰而希望提供自己的,因此我们在ApplicationWindow中使用FramelessWindowHint标志。为了实现与窗口的等效交互,我们覆盖了我们定制的MenuBar的contentItem属性,并显示一些信息文本以及交互可能性的拖动或关闭应用程序。我们使用了内联组件来简化此过程。
            component InteractionButton: Rectangle {
                id: interactionButton

                signal action()
                property alias hovered: hoverHandler.hovered

                Layout.fillHeight: true
                Layout.preferredWidth: height

                color: hovered ? Colors.background : "transparent"
                HoverHandler {
                    id: hoverHandler
                }
                TapHandler {
                    id: tapHandler
                    onTapped: interactionButton.action()
                }
            }

            InteractionButton {
                id: minimize

                onAction: root.dragWindow.showMinimized()
                Rectangle {
                    anchors.centerIn: parent
                    color: parent.hovered ? Colors.iconIndicator : Colors.icon
                    height: 2
                    width: parent.height - 14
                }
            }

            InteractionButton {
                id: maximize
    ...
左侧的侧边栏包括顶部带复选的导航按钮和底部的单次按钮。使用ButtonGroup和容器来确保在任何时候只有一个条目是活跃的。然后,我们可以使用当前位置的属性别名以及StackLayout提供不同的视图。
此技术使我们能够通过添加另一个按钮和StackLayout内的相应元素来简单地扩展功能。
                StackLayout {
                    anchors.fill: parent
                    currentIndex: sidebar.currentTabIndex

                    // Shows the help text.
                    Text {
                        text: qsTr("This example shows how to use and visualize the file system.\n\n"
                                 + "Customized Qt Quick Components have been used to achieve this look.\n\n"
                                 + "You can edit the files but they won't be changed on the file system.\n\n"
                                 + "Click on the folder icon to the left to get started.")
                        wrapMode: TextArea.Wrap
                        color: Colors.text
                    }

                    // Shows the files on the file system.
                    FileSystemView {
                        id: fileSystemView
                        color: Colors.surface1
                        onFileClicked: path => root.currentFilePath = path
                    }
                }
StackLayout包括信息文本和一些内容,它是显示文件和文件夹的 customize 组件。然后我们可以从 C++ 模型中检索数据,并根据需要选择和读取文件。
QString FileSystemModel::readFile(const QString &filePath)
{
    // Don't issue errors for an empty path, as the initial binding
    // will result in an empty path, and that's OK.
    if (filePath.isEmpty())
        return {};

    QFile file(filePath);

    if (file.size() >= 2'000'000)
        return tr("File size is too big.\nYou can read files up to %1 MB.").arg(2);

    static const QMimeDatabase db;
    const QMimeType mime = db.mimeTypeForFile(QFileInfo(file));

    // Check if the mimetype is supported and return the content.
    const auto mimeTypesForFile = mime.parentMimeTypes();
    for (const auto &m : mimeTypesForFile) {
        if (m.contains("text", Qt::CaseInsensitive)
                || mime.comment().contains("text", Qt::CaseInsensitive)) {
            if (!file.open(QIODevice::ReadOnly | QIODevice::Text))
                return tr("Error opening the File!");

            QTextStream stream(&file);
            return stream.readAll();
        }
    }
    return tr("Filetype not supported!");
}
在 TreeView 中右键点击文件夹,将弹出一个菜单,允许控制 TreeView 的 rootIndex 属性。
            MyMenu {
                id: contextMenu
                Action {
                    text: qsTr("Set as root index")
                    onTriggered: {
                        fileSystemTreeView.rootIndex = fileSystemTreeView.index(treeDelegate.row, 0)
                    }
                }
                Action {
                    text: qsTr("Reset root index")
                    onTriggered: fileSystemTreeView.rootIndex = undefined
                }
            }
        }
使用 SplitView,我们可以动态分配 StackLayout 和编辑器之间的空间。我们的编辑器包含了显示打开的文件并提供所有编辑文本文件所需功能的 TextArea。此外,我们还提供了行号的可视化表示,可在菜单中切换其开闭。
            Editor {
                id: editor
                showLineNumbers: root.showLineNumbers
                currentFilePath: root.currentFilePath
                SplitView.fillWidth: true
                SplitView.fillHeight: true
            }
自定义组件
为了更好地理解自定义过程,请首先研究 这篇文章。我们在整个示例中都使用可重用和自定义的组件。
例如,MyMenu 组件自定义了菜单的 背景 属性以及其代理的 内容项 和 背景 属性。
// Copyright (C) 2023 The Qt Company Ltd.
// SPDX-License-Identifier: LicenseRef-Qt-Commercial OR BSD-3-Clause

import QtQuick
import QtQuick.Controls.Basic
import FileSystemModule

Menu {
    id: root

    delegate: MenuItem {
        id: menuItem
        contentItem: Item {
            Text {
                anchors.verticalCenter: parent.verticalCenter
                anchors.left: parent.left
                anchors.leftMargin: 5

                text: menuItem.text
                color: enabled ? Colors.text : Colors.disabledText
            }
            Rectangle {
                id: indicator

                anchors.verticalCenter: parent.verticalCenter
                anchors.right: parent.right
                width: 6
                height: parent.height

                visible: menuItem.highlighted
                color: Colors.color2
            }
        }
        background: Rectangle {
            implicitWidth: 210
            implicitHeight: 35
            color: menuItem.highlighted ? Colors.active : "transparent"
        }
    }
    background: Rectangle {
        implicitWidth: 210
        implicitHeight: 35
        color: Colors.surface2
    }
}
另一个示例是对 FileSystemView 中的 ScrollIndicator 进行自定义,它还使用了自定义动画。在这里我们也重写了 内容项。
        ScrollIndicator.vertical: ScrollIndicator {
            active: true
            implicitWidth: 15

            contentItem: Rectangle {
                implicitWidth: 6
                implicitHeight: 6

                color: Colors.color1
                opacity: fileSystemTreeView.movingVertically ? 0.5 : 0.0

                Behavior on opacity {
                    OpacityAnimator {
                        duration: 500
                    }
                }
            }
        }
Python 版本
如果您对这个示例的 Python 版本感兴趣,可以在 这里找到。这展示了 Qt for Python 的使用,并演示了如何用它来创建相同的应用程序。
此外,还有一个详细的 教程 可用,提供了如何逐步使用额外功能扩展此示例的步骤说明。如果您想探索并了解更多关于基于文件系统浏览器现有功能构建的信息,这个教程可能很有用。
© 2024 Qt 公司有限公司。包含在此处的文档贡献均为各自所有者的版权。本处提供的文档是根据由自由软件基金会发布的 GNU 自由文档许可证版本 1.3 的条款许可的。Qt 及相关的标志是芬兰和/或其他国家/地区的 Qt 公司的商标。所有其他商标均属于各自所有者。
