QML摄像头应用程序
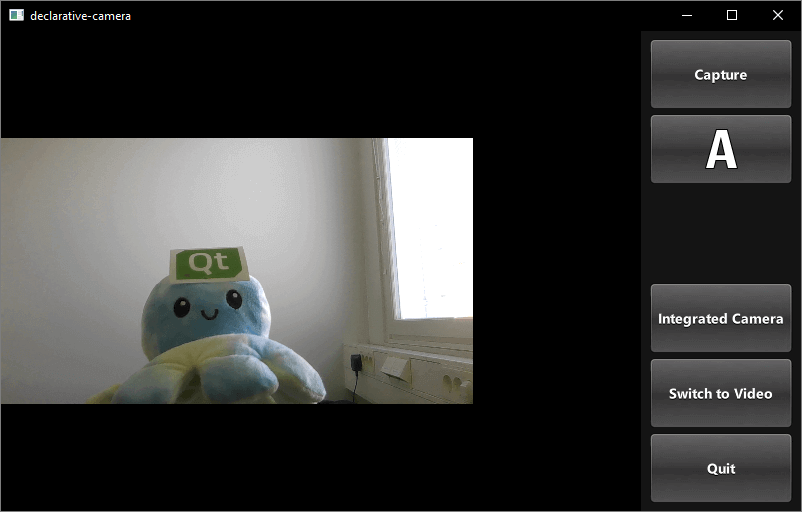
这个基于Qt Quick的应用程序展示了如何使用API来捕获静态图像或视频。

这个示例演示了如何通过QML访问摄像头功能。它展示了如何更改设置并捕获图像或视频。
运行示例
要从Qt Creator中运行示例,请打开欢迎模式并从示例中选择示例。有关更多信息,请参阅构建和运行示例。
应用程序结构
本例中的大部分QML代码都支持用户界面。为实现需求而创建的自定义类型已使用现有的Qt Quick控件实现。
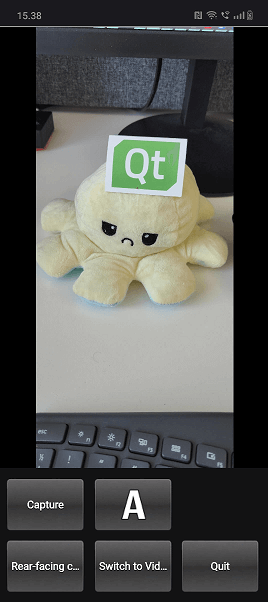
使用屏幕方向来选择布局
方向和控制布局状态逻辑被封装在一个单独的项目中,如下所示controlLayout
    Item {
        id: controlLayout

        readonly property bool isMobile: Qt.platform.os === "android" || Qt.platform.os === "ios"
        readonly property bool isLandscape: Screen.desktopAvailableWidth >= Screen.desktopAvailableHeight
        property int buttonsWidth: state === "MobilePortrait" ? Screen.desktopAvailableWidth / 3.4 : 114

        states: [
            State {
                name: "MobileLandscape"
                when: controlLayout.isMobile && controlLayout.isLandscape
            },
            State {
                name: "MobilePortrait"
                when: controlLayout.isMobile && !controlLayout.isLandscape
            },
            State {
                name: "Other"
                when: !controlLayout.isMobile
            }
        ]

        onStateChanged: {
            console.log("State: " + controlLayout.state)
        }
    }
stillControls和videoControls对象都绑定到该项目的state和buttonsWidth属性,如下所示stillControls
    PhotoCaptureControls {
        id: stillControls
        state: controlLayout.state
        anchors.fill: parent
        buttonsWidth: controlLayout.buttonsWidth
        buttonsPanelPortraitHeight: cameraUI.buttonsPanelPortraitHeight
        buttonsPanelWidth: cameraUI.buttonsPanelLandscapeWidth
        captureSession: captureSession
        visible: (cameraUI.state === "PhotoCapture")
        onPreviewSelected: cameraUI.state = "PhotoPreview"
        onVideoModeSelected: cameraUI.state = "VideoCapture"
        previewAvailable: imageCapture.preview.length !== 0
    }
为了支持调试,记录了布局状态变化的消息。
以下是纵向布局

您可以看到state属性最初设置为PhotoCapture。
然后定义状态本身如下
    states: [
        State {
            name: "PhotoCapture"
            StateChangeScript {
                script: {
                    camera.start()
                }
            }
        },
        State {
            name: "PhotoPreview"
        },
        State {
            name: "VideoCapture"
            StateChangeScript {
                script: {
                    camera.start()
                }
            }
        },
        State {
            name: "VideoPreview"
            StateChangeScript {
                script: {
                    camera.stop()
                }
            }
        }
    ]
捕获控件
捕获控件实现在PhotoCaptureControls.qml和VideoCaptureControls.qml中。它们每个都基于一个FocusScope,该Scope定义了控制按钮使用的常见按钮尺寸和间距,然后声明了按钮。
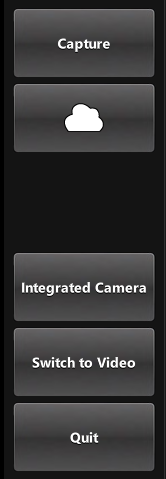
这将在屏幕右侧生成一行,按从上到下的顺序列出以下控件
- 一个
Capture或Record按钮,用于启动捕获。 - 一个
capture properties按钮,显示当前选择的白平衡模式的图标,并且在按下时使用弹出显示以下选项的图标- 闪光模式(如果可用)
- 白平衡模式
- 曝光补偿
- 一个
View按钮,一旦捕获了某个东西。 - 一个显示当前选择的捕获设备并按下时提供一个可用设备列表以进行切换的按钮。
- 一个显示备用捕获模式(视频或照片)并根据当前活动选择切换模式的
Switch To按钮。 - 一个退出的
Quit按钮。


图像捕获
触发此功能的按钮定义在 CameraButton.qml:但是其与摄像头的交互在 controls 类型中,让我们看看 PhotoCaptureControls
            CameraButton {
                text: "Capture"
                implicitWidth: captureControls.buttonsWidth
                visible: captureControls.captureSession.imageCapture.readyForCapture
                onClicked: captureControls.captureSession.imageCapture.captureToFile("")
            }
缩放控制
在 ZoomControl.qml 中实现,ZoomControl 类型基于 Item,创建一个表示缩放级别的条形,也可以拖动。它使用指数计算方法根据 grove 的位置确定缩放因子。
仅在初始缩放大于 1 时条形可见。这意味着当前活动的摄像头具有缩放功能。

Item {
    id : zoomControl
    property real currentZoom : 1
    property real maximumZoom : 1
    signal zoomTo(real target)

    visible: zoomControl.maximumZoom > 1

    MouseArea {
        id : mouseArea
        anchors.fill: parent

        property real initialZoom : 0
        property real initialPos : 0

        onPressed: {
            initialPos = mouseY
            initialZoom = zoomControl.currentZoom
        }

        onPositionChanged: {
            if (pressed) {
                var target = initialZoom * Math.pow(5, (initialPos-mouseY)/zoomControl.height);
                target = Math.max(1, Math.min(target, zoomControl.maximumZoom))
                zoomControl.zoomTo(target)
            }
        }
    }

    Item {
        id : bar
        x : 16
        y : parent.height/4
        width : 24
        height : parent.height/2

        Rectangle {
            anchors.fill: parent

            smooth: true
            radius: 8
            border.color: "white"
            border.width: 2
            color: "black"
            opacity: 0.3
        }

        Rectangle {
            id: groove
            x : 0
            y : parent.height * (1.0 - (zoomControl.currentZoom-1.0) / (zoomControl.maximumZoom-1.0))
            width: parent.width
            height: parent.height - y
            smooth: true
            radius: 8
            color: "white"
            opacity: 0.5
        }

        Text {
            id: zoomText
            anchors {
                left: bar.right; leftMargin: 16
            }
            y: Math.min(parent.height - height, Math.max(0, groove.y - height / 2))
            text: "x" + Math.round(zoomControl.currentZoom * 100) / 100
            font.bold: true
            color: "white"
            style: Text.Raised; styleColor: "black"
            opacity: 0.85
            font.pixelSize: 18
在 PhotoCaptureControls.qml 和 VideoCaptureControls.qml 中,信号 zoomTo 将将所选摄像头的 zoomFactor 属性设置为计算的 target 值,并更新缩放控制条。
    ZoomControl {
        x : 0
        y : captureControls.state === "MobilePortrait" ? -buttonPaneShadow.height : 0
        width : 100
        height: parent.height

        currentZoom: captureControls.captureSession.camera.zoomFactor
        maximumZoom: captureControls.captureSession.camera.maximumZoomFactor
        onZoomTo: (target) => captureControls.captureSession.camera.zoomFactor = target
    }
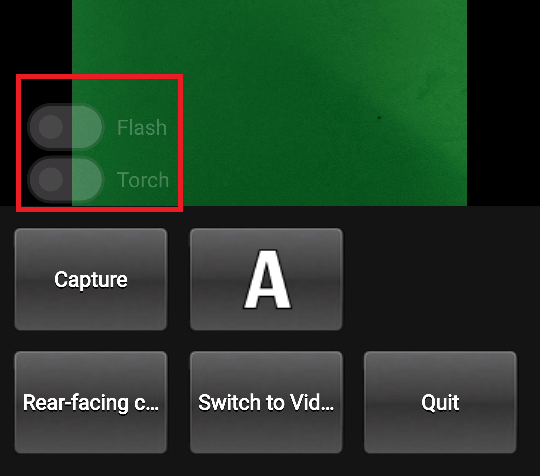
闪光灯和手电筒控制

在 FlashControl.qml 中定义,这可以通过开关来选择闪光灯模式和切换手电筒功能。与缩放控制一样,开关仅在活动设备支持这些功能时在预览窗口上方可见。
在这里检查是否支持这些功能
    property Camera cameraDevice
    property bool mIsFlashSupported: (cameraDevice && cameraDevice.active) ? cameraDevice.isFlashModeSupported(Camera.FlashOn) : false
    property bool mIsTorchSupported: (cameraDevice && cameraDevice.active) ? cameraDevice.isTorchModeSupported(Camera.TorchOn) : false
在这里实现 flashModeControl 开关,该开关也直接控制摄像头设备。
        Switch {
            id: flashModeControl
            visible: flashControl.mIsFlashSupported
            opacity: checked ? 0.75 : 0.25
            text: "Flash"
            contentItem: Text {
                text: flashModeControl.text
                color: "white"
                leftPadding: flashModeControl.indicator.width + flashModeControl.spacing
            }

            onPositionChanged: {
                if (position) {
                    if (torchModeControl.checked)
                        torchModeControl.toggle();
                    flashControl.cameraDevice.flashMode = Camera.FlashOn

                } else {
                    flashControl.cameraDevice.flashMode = Camera.FlashOff
                }
            }
        }
手电筒控制以类似的方式实现。
© 2024 Qt 公司有限。包含在此处的文档贡献是各自所有者的版权。此处提供的文档是根据自由软件开发基金会发布的 GNU 自由文档许可证版本 1.3 的条款许可的。Qt 和相应的标志是芬兰的 Qt 公司以及世界各地的注册商标。所有其他商标均为其各自所有者的财产。
